Let’s be honest- first impressions matter! And all it takes is a simple and sleek business card to spark that connection. Whether you’re swapping one at an event or slipping one into a coffee shop conversation, a well-created card can do wonders.
Here’s how to make a business card that actually leaves a mark. Let’s break it down step by step.
Table of Contents
- Define your Purpose
- Collect and Organize the Information
- Select the Desired Tool
- Choose the Right Size and Format
- Choose a Template
- Add Design Features
- Seal the Deal with a Brand Element
- Add your Information
- Give it a Final Polish
- Print-Perfect it
- Ready, Set, Share
1. Define your Purpose
Before designing any business card, it’s essential to understand why you need it and for whom it’s intended. Clarifying the objectives sets the tone for design, content, and branding. This step primarily aims at ensuring that the card serves as a strategic communication tool.
The purpose of a business card in different contexts
These are just a few examples that highlight the purposes in various contexts.
- For corporates
It serves as a formal representation of the company and the individual’s role within it while establishing credibility and professionalism.
- For small business owners
It builds credibility, creates strong first impressions, and reinforces business identity in local or referral-based networks.
- For artists and creative professionals
It showcases artistic flair, individuality, and style through innovative visuals and serves as a mini portfolio.
2. Collect and Organize the Information
Once the purpose is defined, the next step in how to make a business card is to gather and arrange all the information. You can use Google Docs to list key details like your name, contact info, email address, website, social media handles, and any other branding details. Then, you’ll just have to copy and paste the contents into the template. Doing so saves time and makes the process hassle-free.
3. Select the Desired Tool
Now, the third step is choosing the platform that aligns with your creative direction and fits your skill level and style. The right choice of tool makes your branding stand out. Here are some of the useful tools you can count on-
Canva
It is ideal for beginners and pros alike. Canva offers a wide range of templates, from social media posts to presentations and business cards. With its drag-and-drop feature interface, Canva makes the entire process easy and accessible for its users. You can also make your business card for free by using its basic version.
Visme
It is an excellent choice for those who want more control over their designs. It combines clean aesthetics with flexible layouts, perfect for detailed adjustments. Overall, it’s great for turning your information into a visually compelling and professional card.
Digifloat
If you’re looking for a hassle-free way to get professional business card designs, Digifloat is a great option. Unlike free tools, which rely on templates, we offer unlimited graphic designs with a hands-free approach so you can focus on running your business.
You also get full rights to your designs, transparent turnaround times, and support for high-volume needs, all at affordable rates.
4. Choose the Right Size and Format
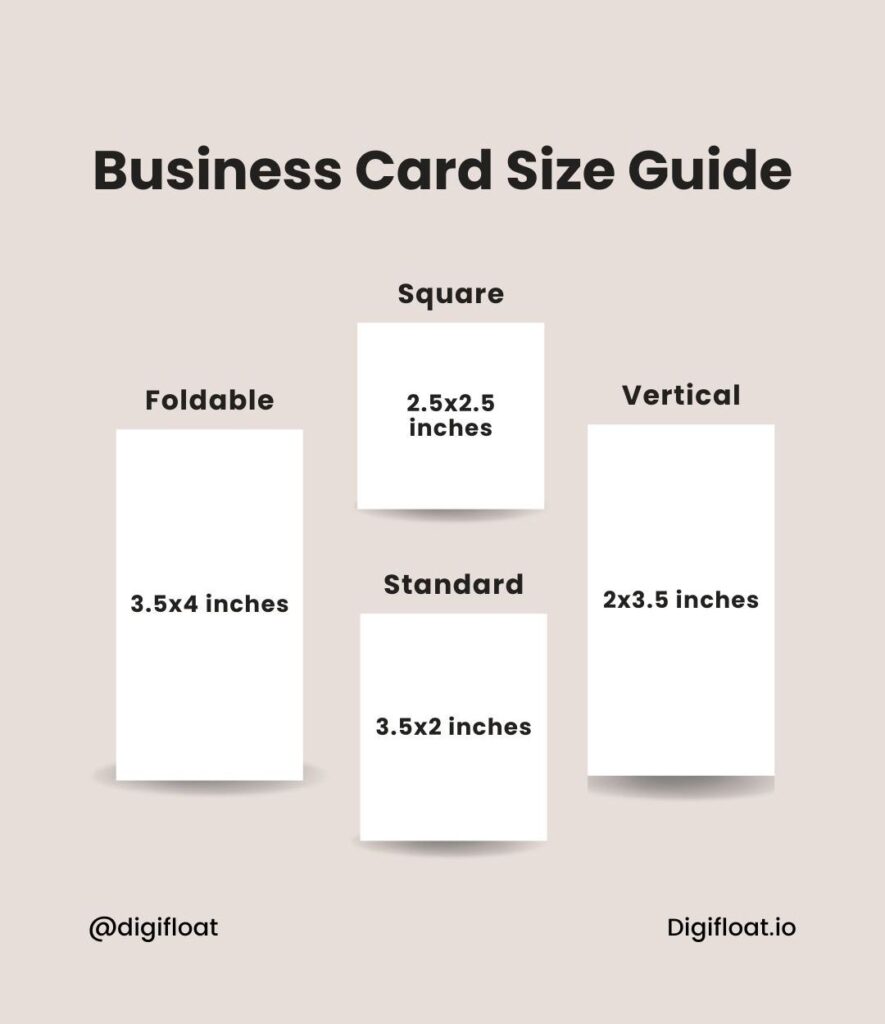
This step focuses on selecting a layout and format that presents your information clearly and effectively. A majority of the businesses prefer the standard size of 3.5 x 2 inches or 9 x 5 centimeters. However, if you want to stand out, you can explore other formats—like folded, square, or rounded—depending on your brand’s personality and preferences.

5. Choose a Template
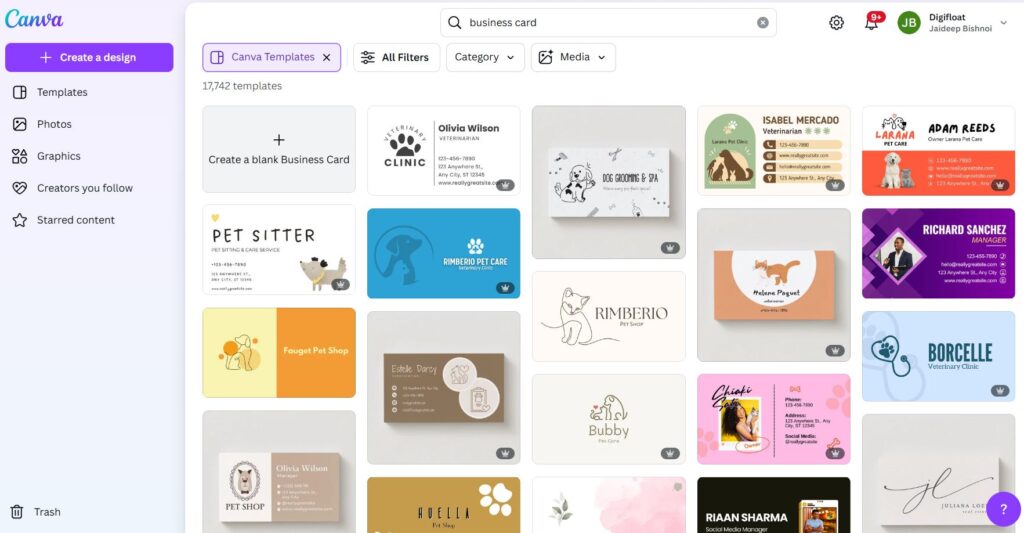
With your info ready and the tools picked, now’s the fun part- scroll through templates and find the one that connects with your vision. Most tools have lots of options- some are simple, and some are bold. Look for one that fits your business’s vibe and gives you enough space to tweak things your way.
For example, if you choose Canva, this is how the template options will look.

6. Add Design Features
At this stage, the focus shifts to enhancing the aesthetics and functionality by incorporating creative touches. It includes color palettes, typography, textures, layout structures, and visual hierarchy. The goal here is to make the design in a way that defines the objectives of the brand.
This step involves:
- Applying consistent themes
It means that all the components- from color palette and fonts to layout and tone- work together to match your business identity. For example, using your defined color palette, consistent tone of voice, and the right typefaces helps create a cohesive and professional look.
- Accessible fonts
It suggests that your fonts must be legible to everyone, including those with disabilities. You can use your brand fonts; if they don’t work in print, choose the closest alternative.
Creative cue alert: If your design needs an explanation, then it’s not fulfilling its purpose. You need to be careful when choosing these elements. It forms the core of the steps in how to make a business card.
7. Seal the Deal with a Brand Element
Once your details are in place, it’s time to give your card instant recognition. Because what’s your business card without a branding identity? Your logo is the face of your brand- it ties all things together. You can include your tagline or mascot with it. Got it all? Great- now just follow these easy-breezy rules to make the magic happen.
Logo- It shows brand identity. Place everything smartly, usually in a corner, at the top, or even as a background element.
Tagline( if any)- It shows the brand message. It generally goes below the logo or on the back.
Mascot (if any)- It adds personality. You can put it in the bottom corner or on the back as a fun visual.
8. Add your Information
Time to let your card do the talking. Pop in all the information we wrote in Google Docs earlier: your name (of course), your position, your dial-in number, and an email address. If you have a fabulous Instagram or a LinkedIn profile, add it, too.
Make sure you pay special attention to the placement- because where you put things matters just as much as how much you put.
Front
You can keep it simple. You can add the logo, the company’s name, and the tagline of your brand.
Back
You can include the contact number, email address, and your social media handles. To acknowledge your clients or collaborators with more details, you can drop in a QR code.

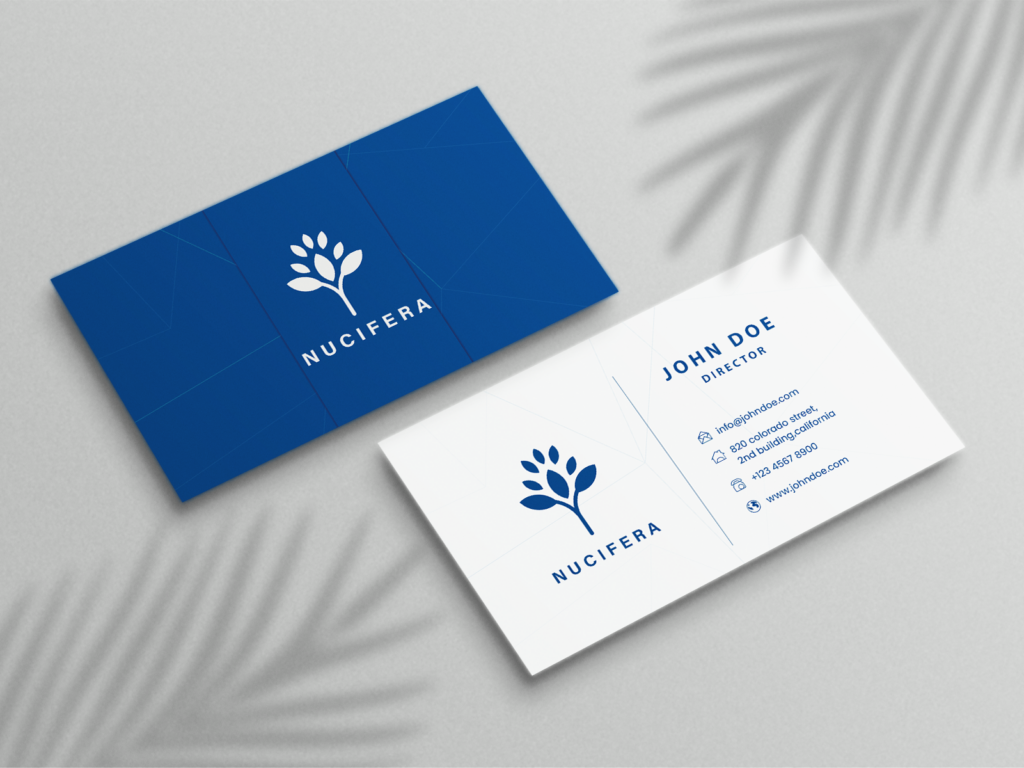
Source- Digifloat Portfolio
9. Give it a Final Polish
Your card is almost ready, but before you hit print, take a moment to review and proofread it. Here’s what you have to look for:
Spelling and grammar
One typo can make a lasting impression- and not a good one. Double-check every word, especially names and contact info.
Alignment & spacing
Arrange the elements, including the font and the sentences, in a sequence. While taking care of the use of margins, padding, and line gaps to improve readability.
Color & Contrast
Make sure your text is readable against the background and that the colors resonate with your brand.
Font consistency
Too many fonts equal chaos. Stick to 1-2 typefaces that reflect your style.
10. Print-Perfect it
You’ve crafted the layout and finalized the content- now it’s time to make sure it gets printed like a pro. A great business card can fall flat if the print quality doesn’t hold up.
Here are a few essential tips to make your pocket-intro look stunning.
- Choose a printing style that fits your budget- whether you’re going to print for a clean, minimal card or a premium, luxe finish.
- Save your design in a print-ready format like TIFF or PDF. These formats lock in layout and image quality.
- Set your design to CMYK mode for accurate color output, and make sure this resolution is at least 300 DPI to avoid blurry or grainy visuals.
- Always print a sample before going for a larger batch..
Add-ons- You can opt for eco-friendly recycled paper and make your business card online without any prints. Platforms like HiHello or Canva let you share your info in a digital format.
10. Ready, Set, Share
Lo and behold! Your network just got an upgrade.
You’ve got a card that looks sharp and says all the right things. Hand it out, attach it with packages or portfolios, or use it as a thank-you note. Leave it behind after meetings or link it up digitally.
Summing Up: How to Make a Business Card
Creating a business card that truly represents your brand doesn’t have to be complicated. With the right approach- and the right tools- you can build something memorable and professional.
If you would rather skip the DIY route and get high-quality, custom designs without the guesswork, we’ve got you covered. Just sign up for our unlimited graphic design services today. From branding consistency to fast turnaround, our in-house team of designers is happy to help.


